Enable Virtual Desks on Your Chromebook
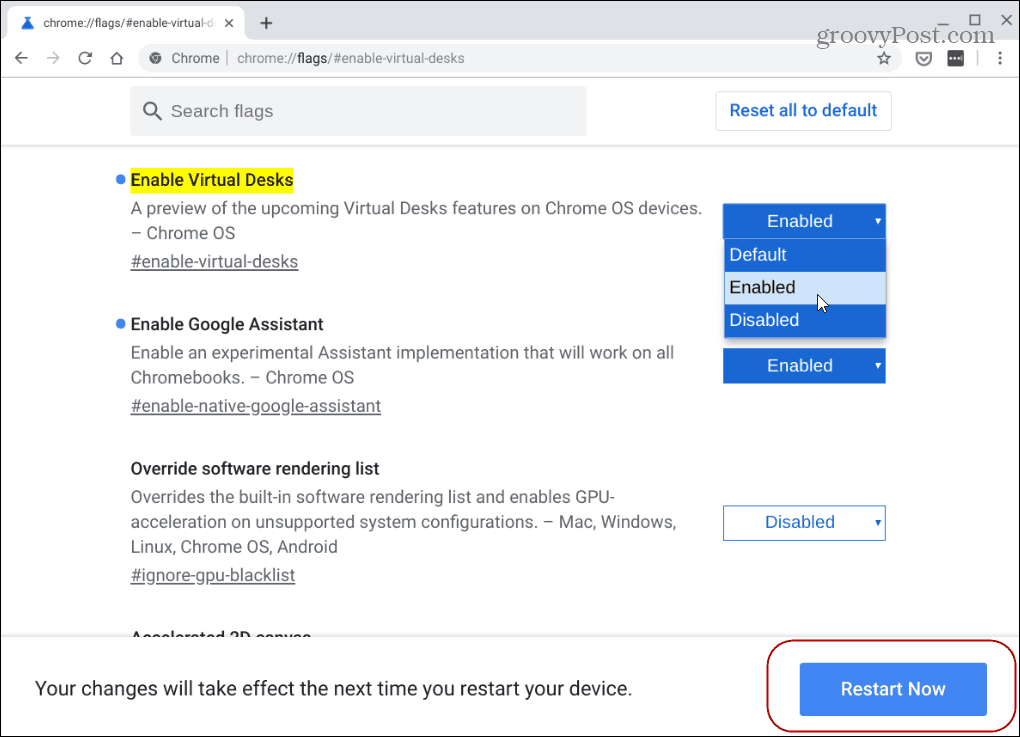
Depending on when you’re reading this, you might not see the feature. Google didn’t officially tout the virtual desktop feature in its release blog. But it’s there. You need to enable it. To do that, launch Chrome and enter the following into the address bar:
For the changes to go into effect, you will need to restart Chrome OS. Just click the Restart Now button at the bottom of the page.
Use Virtual Desks on Chromebook
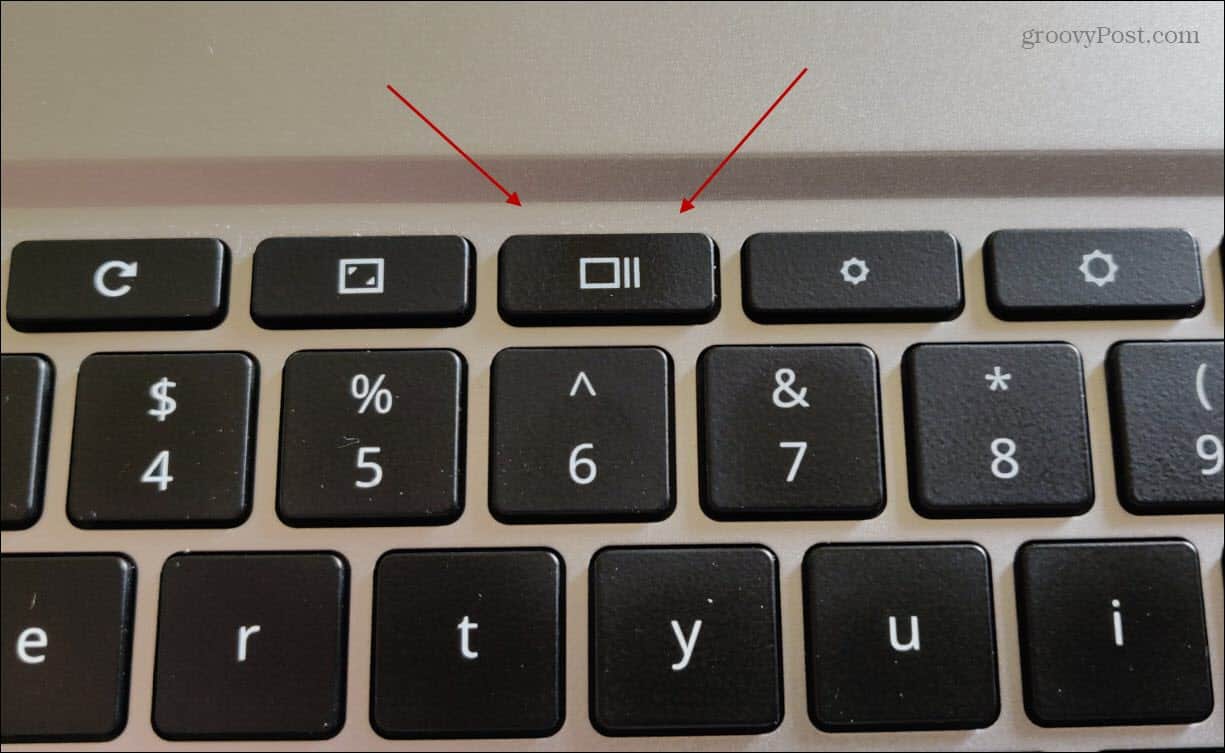
Now that the Virtual Desks feature is enabled hit the F5 key to show all open windows. It’s the top row key just above the 6 on the number row.
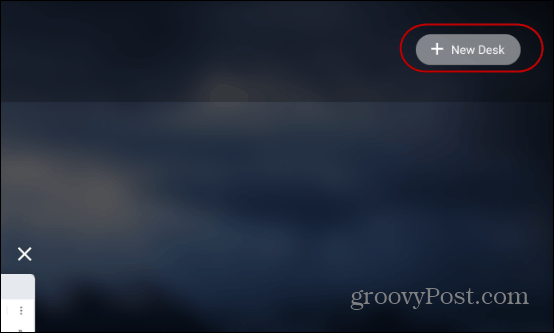
Then to create a new virtual desktop, hit the + New Desk icon at the upper-right corner of the screen.
Do this for each new virtual desktop that you need. Keep in mind you can add up to four different desks.
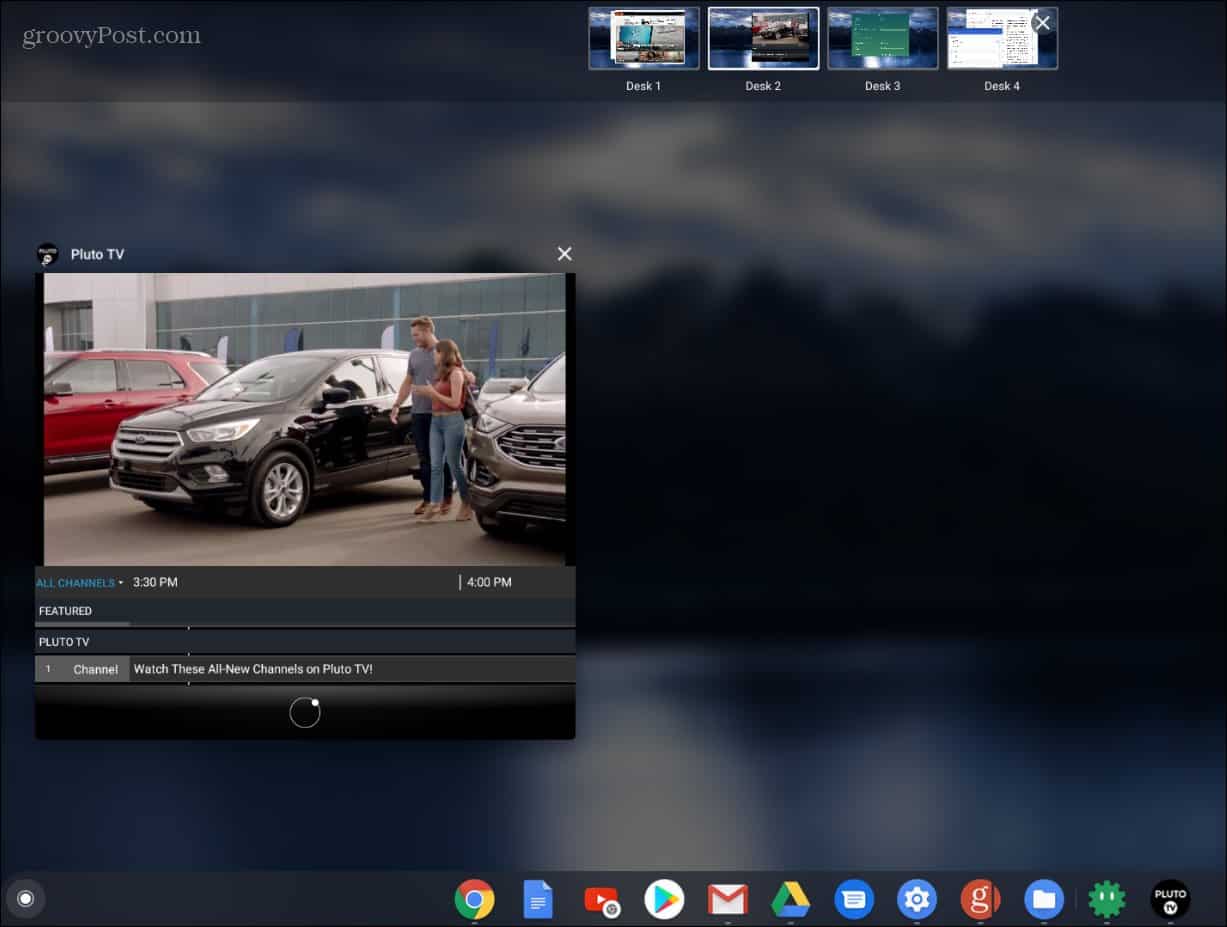
There are a couple of ways to switch between your Virtual Desks. Either hit the F5 key and click on the one you need. Or, you can snap to a specific app on a virtual desk by clicking the application icon on the system tray. To close a Desk, hit the F5 key, hover over the one you want to close, and X out of it.
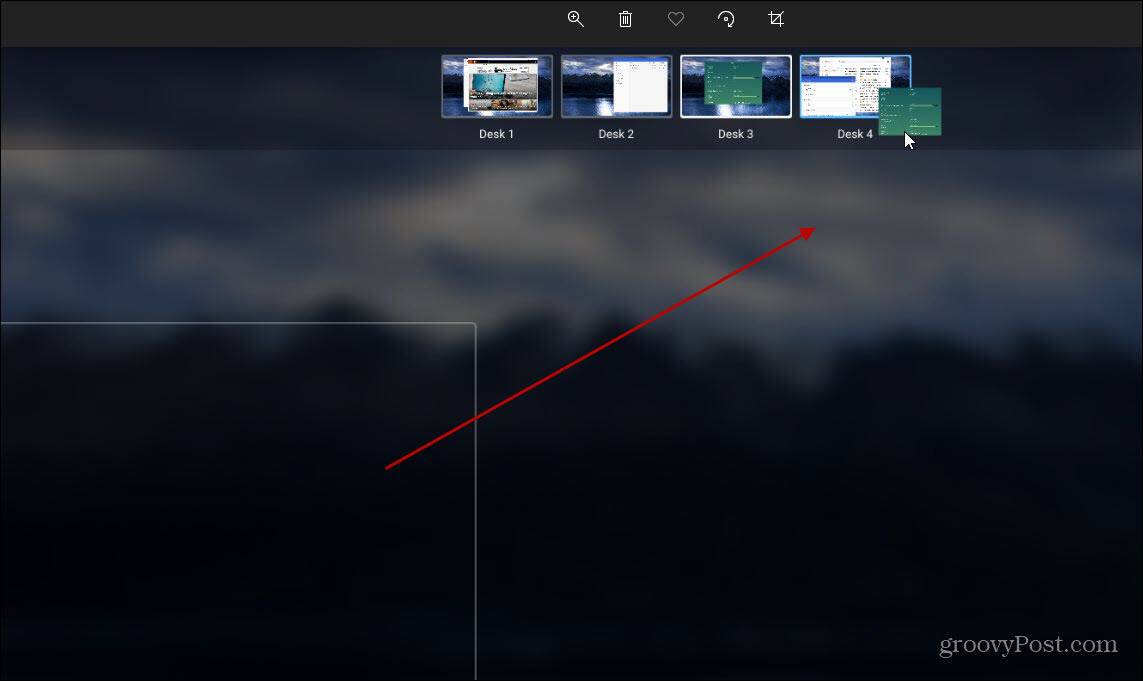
You can also move apps between Virtual desks. Press the F5 key while on the Desk with the app you want to move and drag it to a different Virtual Desk.
This is a great way to open different apps without minimizing and maximizing them all the time from a single window. You can have your main desktop with Google Docs, Messages, and Gmail open on the second, an Android app on the third, and so on. Then you can move apps around to different Virtual Desks as you continue your workflow. If you have a PC, check out how to use virtual desktops on Windows 10. Or use the virtual desktops feature on Windows 11.
![]()

