There are a lot of moments in my daily life where while I look at something I just wish I could import it into Photoshop and make it BIGGER. Like my monitor… or my room… Well, sadly enough Photoshop cannot alter reality just yet, but today we’ll show you how you can use Photoshop to extend any three-dimensional object into the distance using Vanishing Point making it as large as you want (at least in the virtual world).
Finding an appropriate image
First off you need a good picture. In this tutorial I will be using this picture of a wall. Feel free to use that or find your own image.
Using vanishing point to create a grid
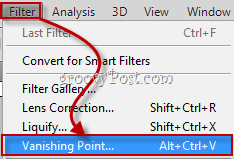
After you have imported the image, you can begin by going into the filters menu and selecting Vanishing Point.
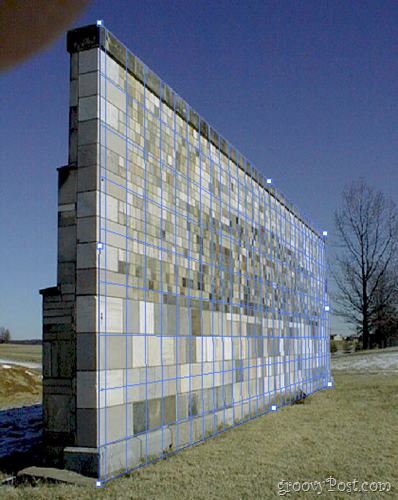
This opens up a new window, where you will find yourself “holding” the Create Plane Tool. It is used to create the three-dimensional grid I was talking about earlier. To begin, simply make 4 anchor points at each corner of your object, like so:
Extending your object into the distance
To begin the extension of your object, you must first enlarge your grid by grabbing one of it’s side anchor points and moving it into the distance. I’ll chose the middle right point – it’s the right one to grab in this case.
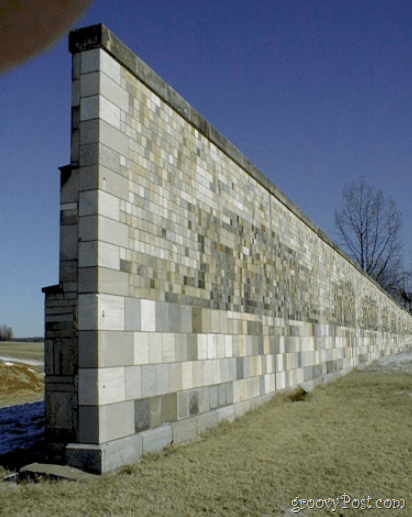
Now grab the Marquee Tool by clicking on it or pressing M on your keyboard. Use it to select the part of the wall which you’d like to extend, and then, while holding the Alt key, click and drag to duplicate the selected area.
Do this as many times as you want until you achieve the result you are looking for.
GroovyTips:
If there are any problematic areas in your image after you have finished using Vanishing Point, don’t be afraid to pick up a Spot Healing Brush Tool. And did I mention you can use it with content aware fill too?
Comment Name * Email *
Δ Save my name and email and send me emails as new comments are made to this post.


