Whether you’re in the middle of writing an email, working on a term paper, or paying your bills – there’s nothing as annoying as when an automatic Windows update consumes all of your system CPU or memory. Thankfully, there are several ways you can turn off Windows 10 updates.
Decide How You Want to Turn Off Windows 10 Updates
There are many different ways to turn off Windows 10 updates. You can completely turn them all off permanently, or you can only turn off non-critical updates. You can also temporarily halt them manually or set a schedule for when they actually happen. Let’s take a look at all of the ways you can control Windows 10 updates and take back control of your computer.
Temporarily Turn Off Windows 10 Updates in Settings
Need to temporarily pause updates so that you can get your work done and then restart updates later? Use Windows 10 Settings to turn off Windows 10 updates temporarily.
Select Start, type “settings,” and select the Settings app.
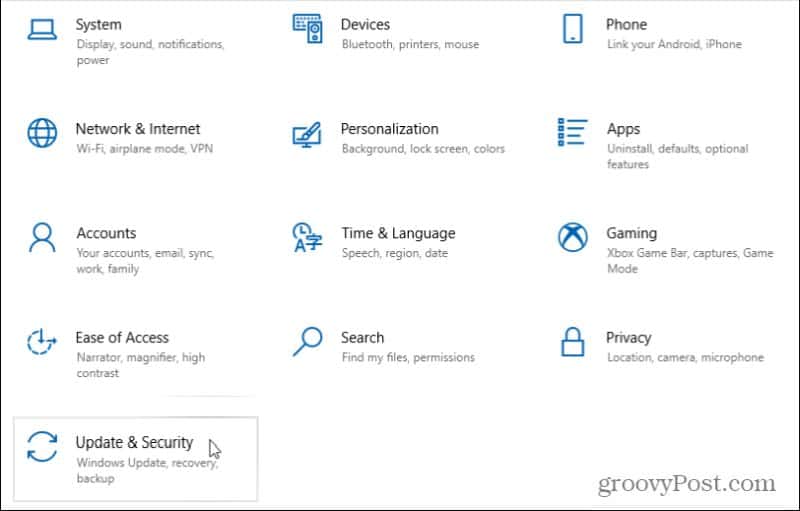
In Windows Settings, select Update & Security.
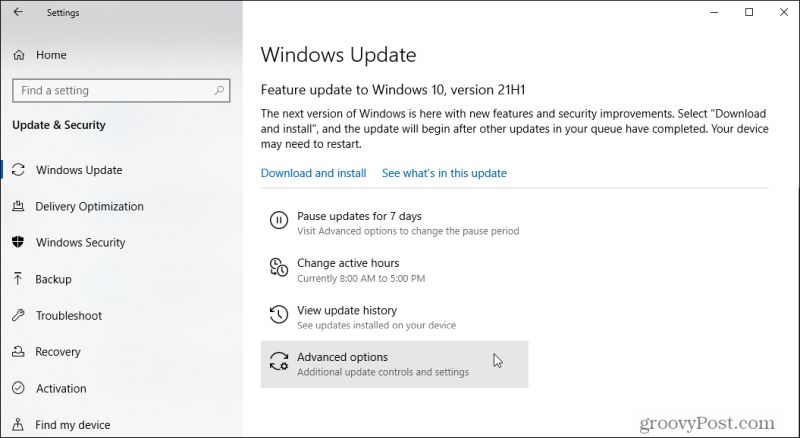
In the Update & Security window, select Windows Update from the left navigation area. Then, scroll down and select Advanced options.
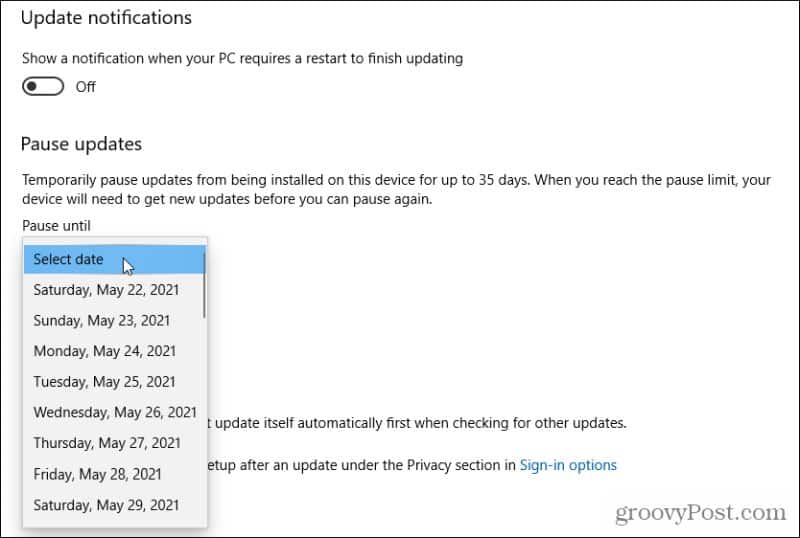
Scroll down to the Pause updates section and use the Pause until drop-down menu to choose how long you’d like to turn off Windows 10 updates temporarily.
Once you set a date, all Windows 10 updates will pause until that date or until you return here and select the Select date option to remove the pause. Or you can select Resume updates on the Windows Update page to accomplish the same thing. In addition to delaying a Windows Update, you can also uninstall past Windows updates.
Permanently Disable the Windows Update Service
If you prefer to turn off Windows Updates permanently, a quick and easy way to do this is by disabling the Windows Update service itself.
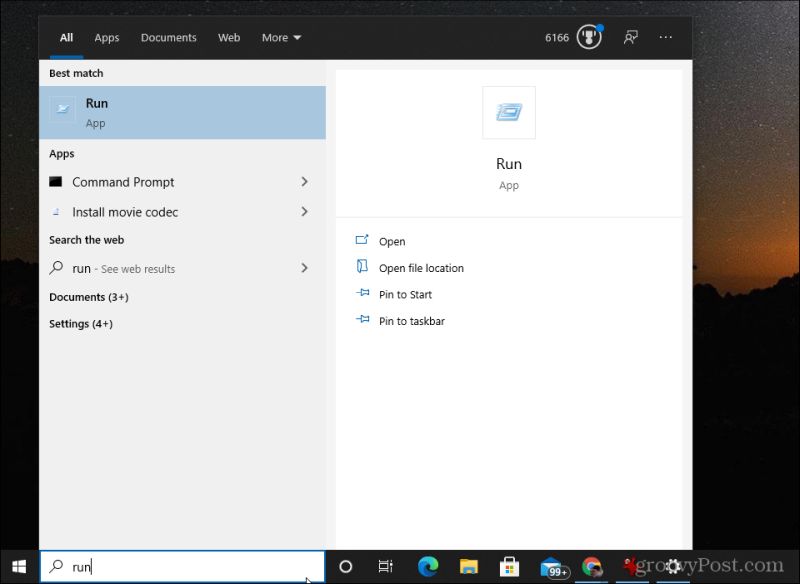
Select Start, type “run,” and select the Run app.
In the Run app, type “services.msc” and select OK.
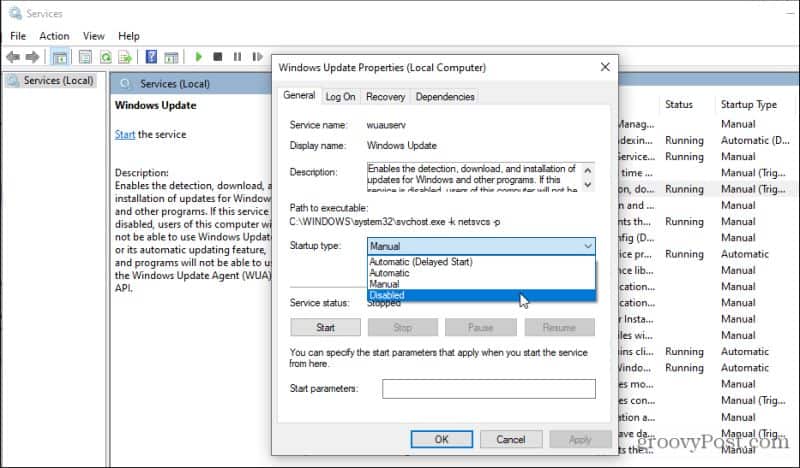
Scroll down to the Windows Update service, right-click it, and select Properties.
Select the General tab, and set the Startup type to Disabled.
Finally, select the Stop button, select Apply, and then select OK.
Finally, restart your computer for the new settings to fully take effect. Now, Windows Updates will never run automatically. You’ll always need to open the Windows Updates window and manually install updates.
Turn off Windows 10 Updates with a Registry Edit
You can also turn off Windows Updates on Windows 10 using the registry editor.
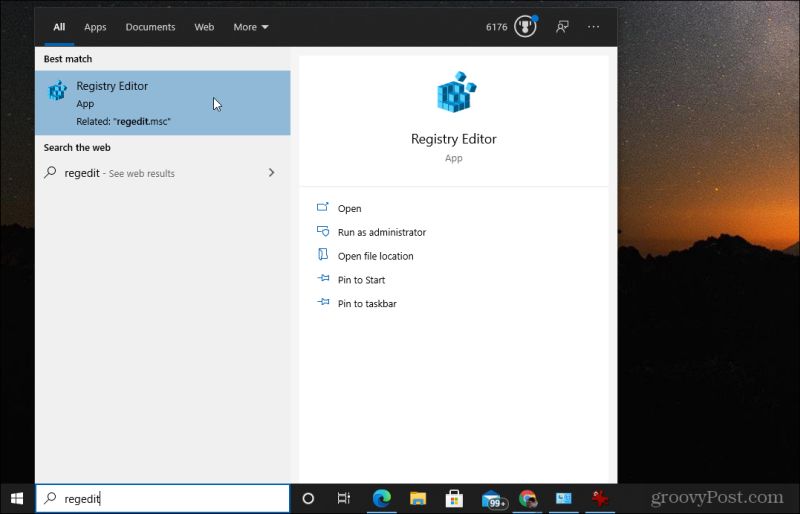
Select the Start menu, type “regedit,” and select the Registry Editor app.
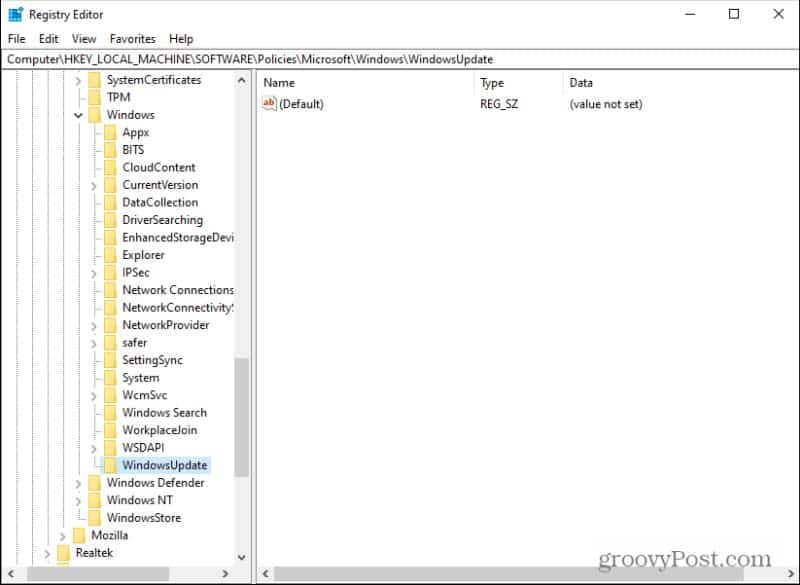
Navigate to HKEY_LOCAL_MACHINE\SOFTWARE\Policies\Microsoft\Windows. Then, right-click on the Windows folder, select New, and then select Key.
Name the key WindowsUpdate and press Enter.
Right-click this new key, then select New and Key again. Name the new key AU.
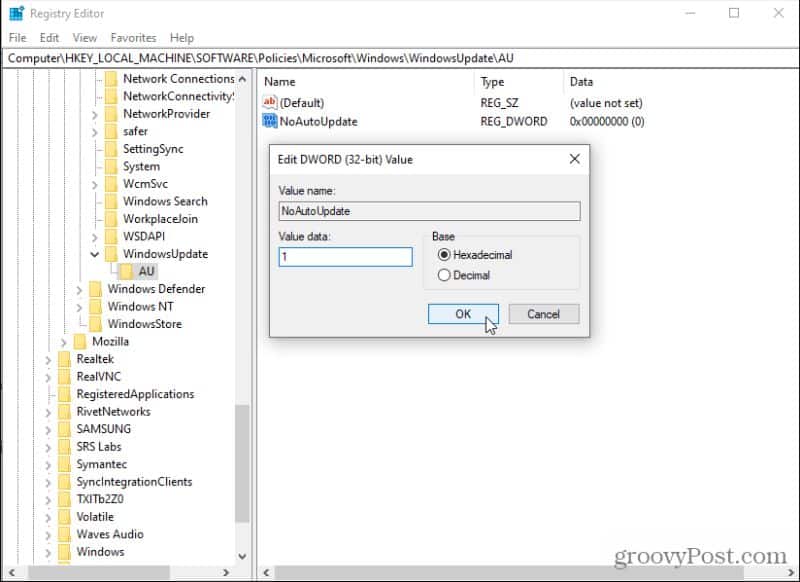
Finally, right-click the new AU key, select New, and select DWORD (32-bit) Value.
Name this new key NoAutoUpdate and press Enter.
Double-click the new NoAutoUpdate key and set its value to 1. Select OK to set the value. Restart the computer to enable these new settings. Now, Windows 10 automatic updates are permanently disabled. It doesn’t mean that you can’t run updates, but to do so, you’ll need to visit the Windows Update section of settings and select Check for updates to obtain the latest ones. If you ever want to re-enable automatic updates, delete the WindowsUpdate key from this same area of the registry.
Hide Windows Updates That Cause Problems
There is a Microsoft tool called Show or Hide Updates that lets you disable specific updates. This is particularly useful if you know specific updates cause problems with your PC. Once hidden, Windows won’t attempt to install that update again. Download the wushowhide.diagcab file from MajorGeeks. Once you’ve downloaded it, double-click the file to run the tool.
Once the tool launches, select Next to continue to the next page of the wizard.
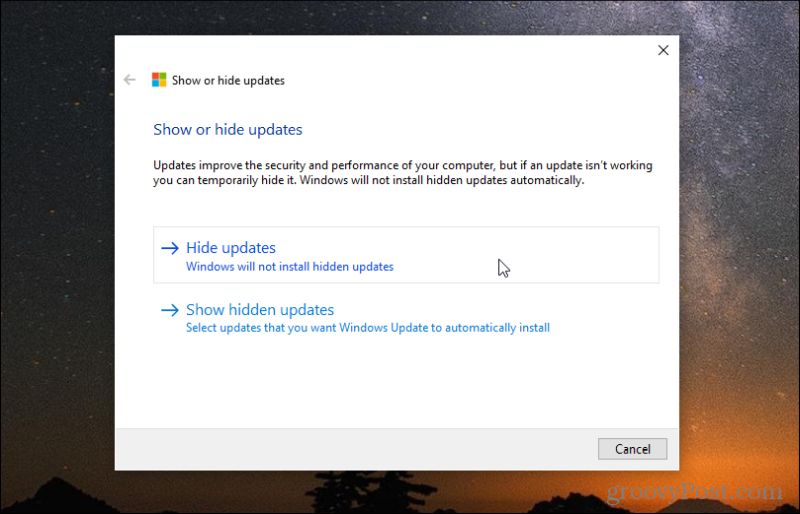
You’ll see a page where you can either Hide updates or Show hidden updates. If this is your first time using the tool, there won’t be any hidden updates to show. To hide any available updates so they don’t install select Hide updates.
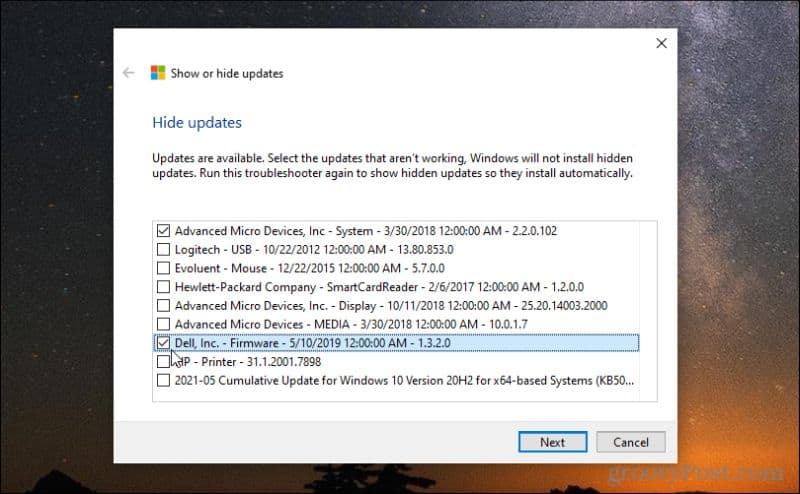
On the next page, you’ll see a list of available updates. Select the checkboxes next to all of the updates you want to hide and prevent from installing on your system.
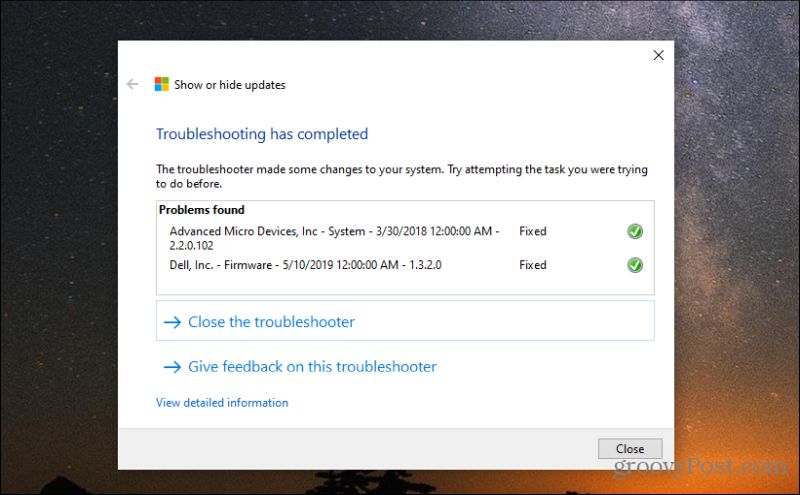
Once the process completes, you’ll see a status update showing the two windows updates you’ve just hidden from the Windows Updates process.
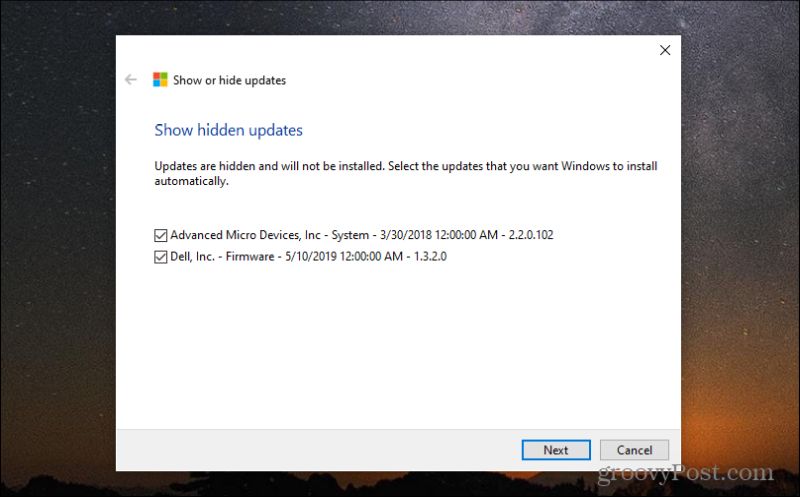
If you ever want to unhide these updates and allow them to install, rerun the Show or Hide Updates tool again. This time, select Show hidden updates. This will show you a window listing all of the Windows Updates you’ve hidden so far.
To unhide them, select the checkboxes next to them and select Next. Once the unhide process is done, the Windows Updates service will recognize them as available to be installed on your system. If you don’t see an expected update in the available list, your system may have already installed it. You can view the Windows 10 Updates history to confirm this. Another way to stop Windows 10 Updates is using the Group Policy Editor. Just keep in mind that you can’t use the Group Policy Editor on the Windows 10 Home edition. It’s only available for Windows 10 Pro.
Other Ways to Turn Off Windows 10 Updates
With Pro and Windows 10 Enterprise. You may also want to consider turning off Windows Update Delivery Optimization on Windows 10 as well. This is a peer-to-peer feature Windows 10 uses to share updates between PCs on the same network. Disabling can reduce network traffic. Be cautious when disabling individual updates or turning off Windows 10 updates entirely. Some updates are important, and not installing them could put your system at risk. Make sure only to do this if you’re certain updates are causing serious problems with your system. Comment Name * Email *
Δ Save my name and email and send me emails as new comments are made to this post.
![]()


